Pete's Projects
Assembly instructions.
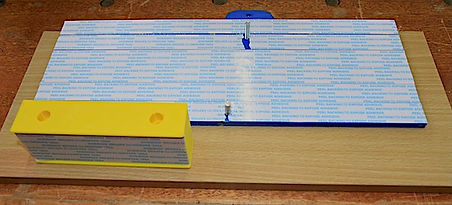
1. You need a base that's flat, smooth and 16mm thick or more. I suggest a piece of Melamine 200x400mm as a practical minimum. The piece shown is 200x450mm and is a left over piece of woodgrain melamine from a filling cabinet.
2. Plane or sand a bevel on one long edge, this is to make sure that the lip of both base sections but up tightly against the the base board.
3. Screw down the main pivot base ( the one with the pivot bolt and pivot pin fitted), then the other base panel.
Make sure the screws are recessed below the base surface.
The most important thing is to make sure the two 200mm long sides lined up as this is the only really important part of the assembly.
4. Then cover both the base, and both sides of the sanding block with Selleys double sided tape (available from most stationery suppliers, or use a similar product but I have found the Selleys to be very good)
You can wrap the take around the ends of the sanding block, and use the score groove to cut off neatly.
5. fit sandpaper to the base as this helps greatly with holding work without slipping. (120 grit or similar) Also fit your preferred sandpaper to the sanding block.
6. Fit the graduated arc over the pivot pin and locking bolt, drop the bushing over the bolt and fit the locking knob.
Check that the ark is at 90 degrees to the sanding fence and gently lock in place.
(Noter we have included a second bushing, this is just in case you find that you are not getting a dead accurate 90 degrees. If this happens you have two choices. (A) sand a little out of the ends of the ark track, or (B) reduce the diameter of the spare bushing slightly. It's unlikely this will be necessary but we have included the extra bushing just in case.
7. Fit the index block, and ingage the index pointer into the zero position, then lightly tighten down the index block.
And that's it.
Fitting the rotary tool.
We have provided two bushes, one threaded 3/4"x12 TPI, and the other 19x2mm. Dremel tools use the former, and many of the other brands use the latter..
1. Thread the appropriate bushing onto your tool, and then fit the bushing into the housing. it should be a neet fit. ( I suggest you rotate the tool around so that the on off with is in the most convnent location to operate while in use.
2. Check that you have the tool sitting square with the base, and using either CA (superglue) or epoxy glue the bushing into the housing.
And that's it. remembering that rotary tools need to be used with care and eye protection.
Angled base set.
Coming very soon with be a set of based that will allow you to use both e rotary tool, and the sanding block at angles of 15, 22.5, 30 and 45 degrees. This feature, along with the multiple angles available of the arc base give you quite a range of possibilities.
Happy Sanding