Pete's Projects
I know, instructions for a sanding bar ??
Think of this more as suggestions, and a few findings after over 40 years of sanding.
Think of sanding as two classes.
(A) Finish sanding, where you are aiming for the best surface finish, and would be using quite fine sand papers.
(B) Construction sanding were you are aiming for the best fit of components. We are going to concentrate on B. I recommend using a coarse sandpaper, 80 grit, or similar, I believe you are better of taking 3, 4, or 5 controlled deliberate strokes with a coarse paper than two or three times that number scrubbing back and fourth with a fine grit.
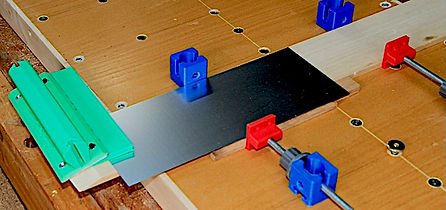
On this, you should taking a firm, controlled grip of the sanding block, but use a light stroke, letting the chosen grit do the cutting.Were possible clamp the wood to the bench, as show, allowing as much support of the wood as practical
Tips
1. Use good quality double sided tape, I now use Sellotape double sided tap, available from stationers and office supplies. Previously I used double sided carpet take, but I believe Sellotape is better. After fitting the paper use a sharp no.11 blade to cut out the holes for the fence screws.
2. Check the sanding block, balsa is a soft wood, and a dinged corner, or burr on the sanding block can create a groove when sanding. ( The block dropping on the floor can create a bent burred corner etc.)One “trick” is to place a thin piece of something between the balsa and the sanding block, a thin sheet of brass, or aluminium works very well.
3. Sanding square. hold a builders square across the work so that the block can run up against it as a guide.4. When sanding things like 1/4” square, do a few at a time, clamping them against a work support. This will give you a set of pieces with one end well dimensioned.
The 15 degree fence, Special mention.
This angle rounds out the set, but is only just practical with this fence design. Please double check that the screws are below the surface of the guide, you may need to use a sharp knife to clean out the recess to allow the screws to sit a little lower