Pete's Projects
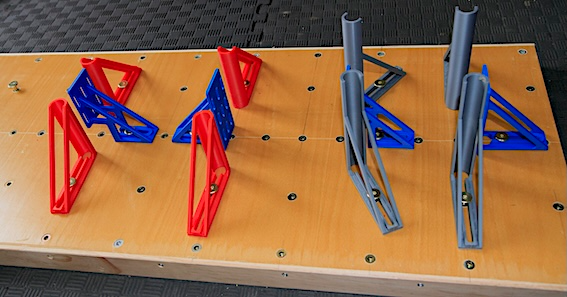
Pete's Fuselage jig with 4 150mm & 4 100mm uprights
Item No. Pete's 1. Price $40.00. Weight 325Gr.
• Simple to use.
• Easy to fit and remove with the "Drop over" installation feature.
• Add extra ones at any time during construction.
• The curved face of the uprights allows you to position the jigs at angles.
• The design allows you to slide the jigs on and off the securing bolts simply by loosening the bold a turn or so. For quick and easy repositioning
• These supports are also compatible with the C of G jig, and the 3rd hand model support, thus giving you great flexibility.
A tip.
Apply some self adhesive rubber strip 25-40mm x 1-2mm to the uprights thus aiding in applying consistent pressure to the fuselage sides.
The boards shown are my "Display Boards" so they are a bit shorter than my regular building boards.
Photo's 1, &2 show what I would consider to be a "Basic" board.
It's laid out with a grid of 100mm insert spacing, and down the middle I have added extra insets on 50mm centres. You can also see a centre line marked.
In my view, this is the practical minimum insert spacing for a fuselage building board.
Photo 3 shows the same set up, but with the optional set of former supports in place, this would be a typical type of positioning.
My strong recommendation is to use a full 50mm grid insert layout, as shown in photo's 4 & 5, this will give you far greater flexibility, especially if you're going to use the same board for other parts of construction. You're going to find that the more you use this system, the more you will appreciate its usefulness, not just for modelling but all sorts of other positional jobs.
(Those with a keen eye will notice that while this board has a 50mm grid, I started with a line of inserts down the middle, then a row either side of them 30mm out, then continued with the 50mm grid. This was not necessary, but I did it because of the width of the board, and as it would be used for many different jobs I took the line, the more the better.)
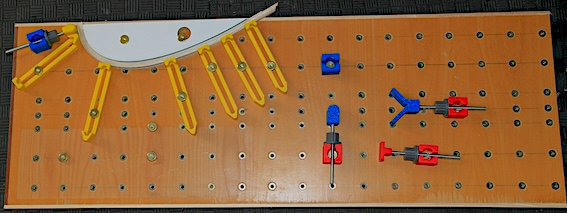
The example shown is me laminating a wing tip out of 8 layers of balsa. you can see that all I needed was a set of "Pete's Push Sticks", except were there was a very tight bend, here I used one of "Pete's Pointy Heads" making it easier to apply a little more pressure just were it's needed.
A Suggestion.
Mark out a set of lines parallel with the centre line, this will help greatly in getting the fuselage sides equal.